Dice Mechanics Analysis
Blades in the Dark
When looking around for information on probabilities, for the popular Blades in the Dark RPG, I wasn’t completely satisfied with the information I found, so I decided to make my own visualizations.
Action
First, we look at the core dice system:
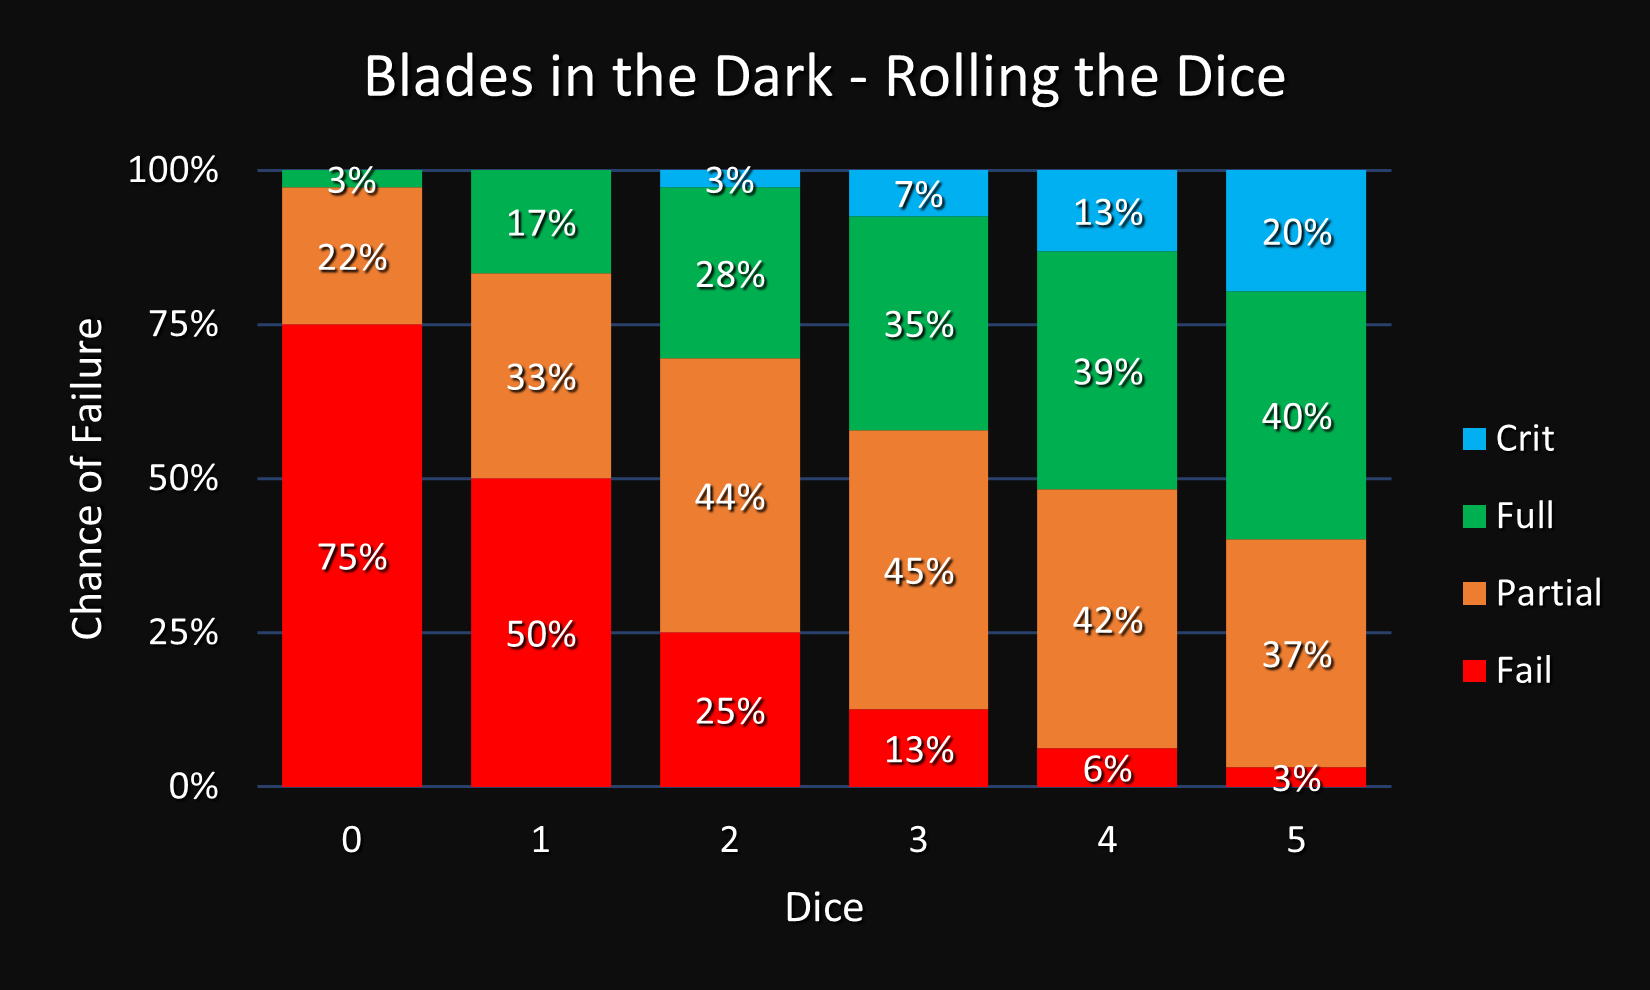
Each additional six-sided dice, beyond the first, halves the chance of failure. Zero dice is a special case that doesn’t quite follow the exponential pattern. Players are 25% more likely to succeed going from zero to one dice, and +25% again going from one dice to two. Beyond two dice we see significant but diminishing returns.
Group Actions
Here’s an extra big version of the chart above for group rolls! Unfortunately critical chance is an over-estimate for group rolls (unless your crew has the synchronized special ablity).
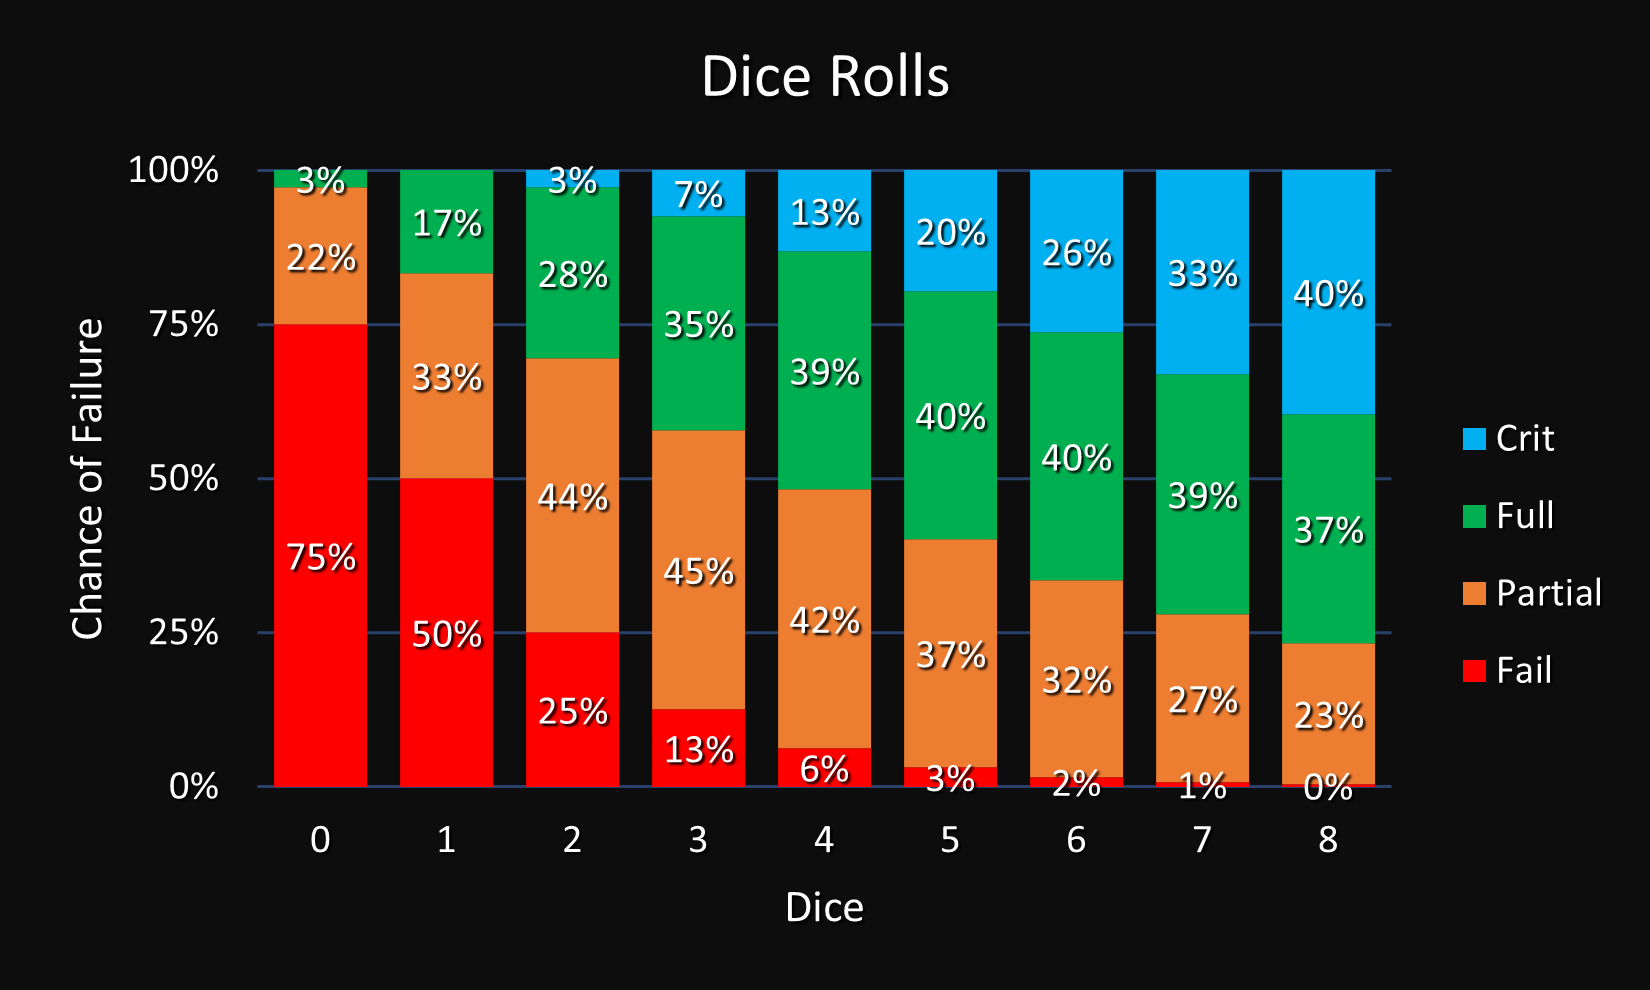
The downside of group actions is the cost in stress. But how much stress will a group action cost on average?
Calculate Average Stress from Group Rolls
| Dice | Stress |
|---|---|
| Player has 0d | Add 0.75 |
| Player has 1d | Add 0.5 |
| Player has 2d | Add 0.25 |
| Player has 3d | Add 0.125 |
| Player has 4d | Add 0.0625 |
| Player has 5d | Add 0.03125 |
Sum the stress for all participating players including the leader. If there are two players and a total of two dice, a group action should cost an average of one stress: the same as getting an assist.
Resistance
Resistance Rolls can cost up to 5 stress.
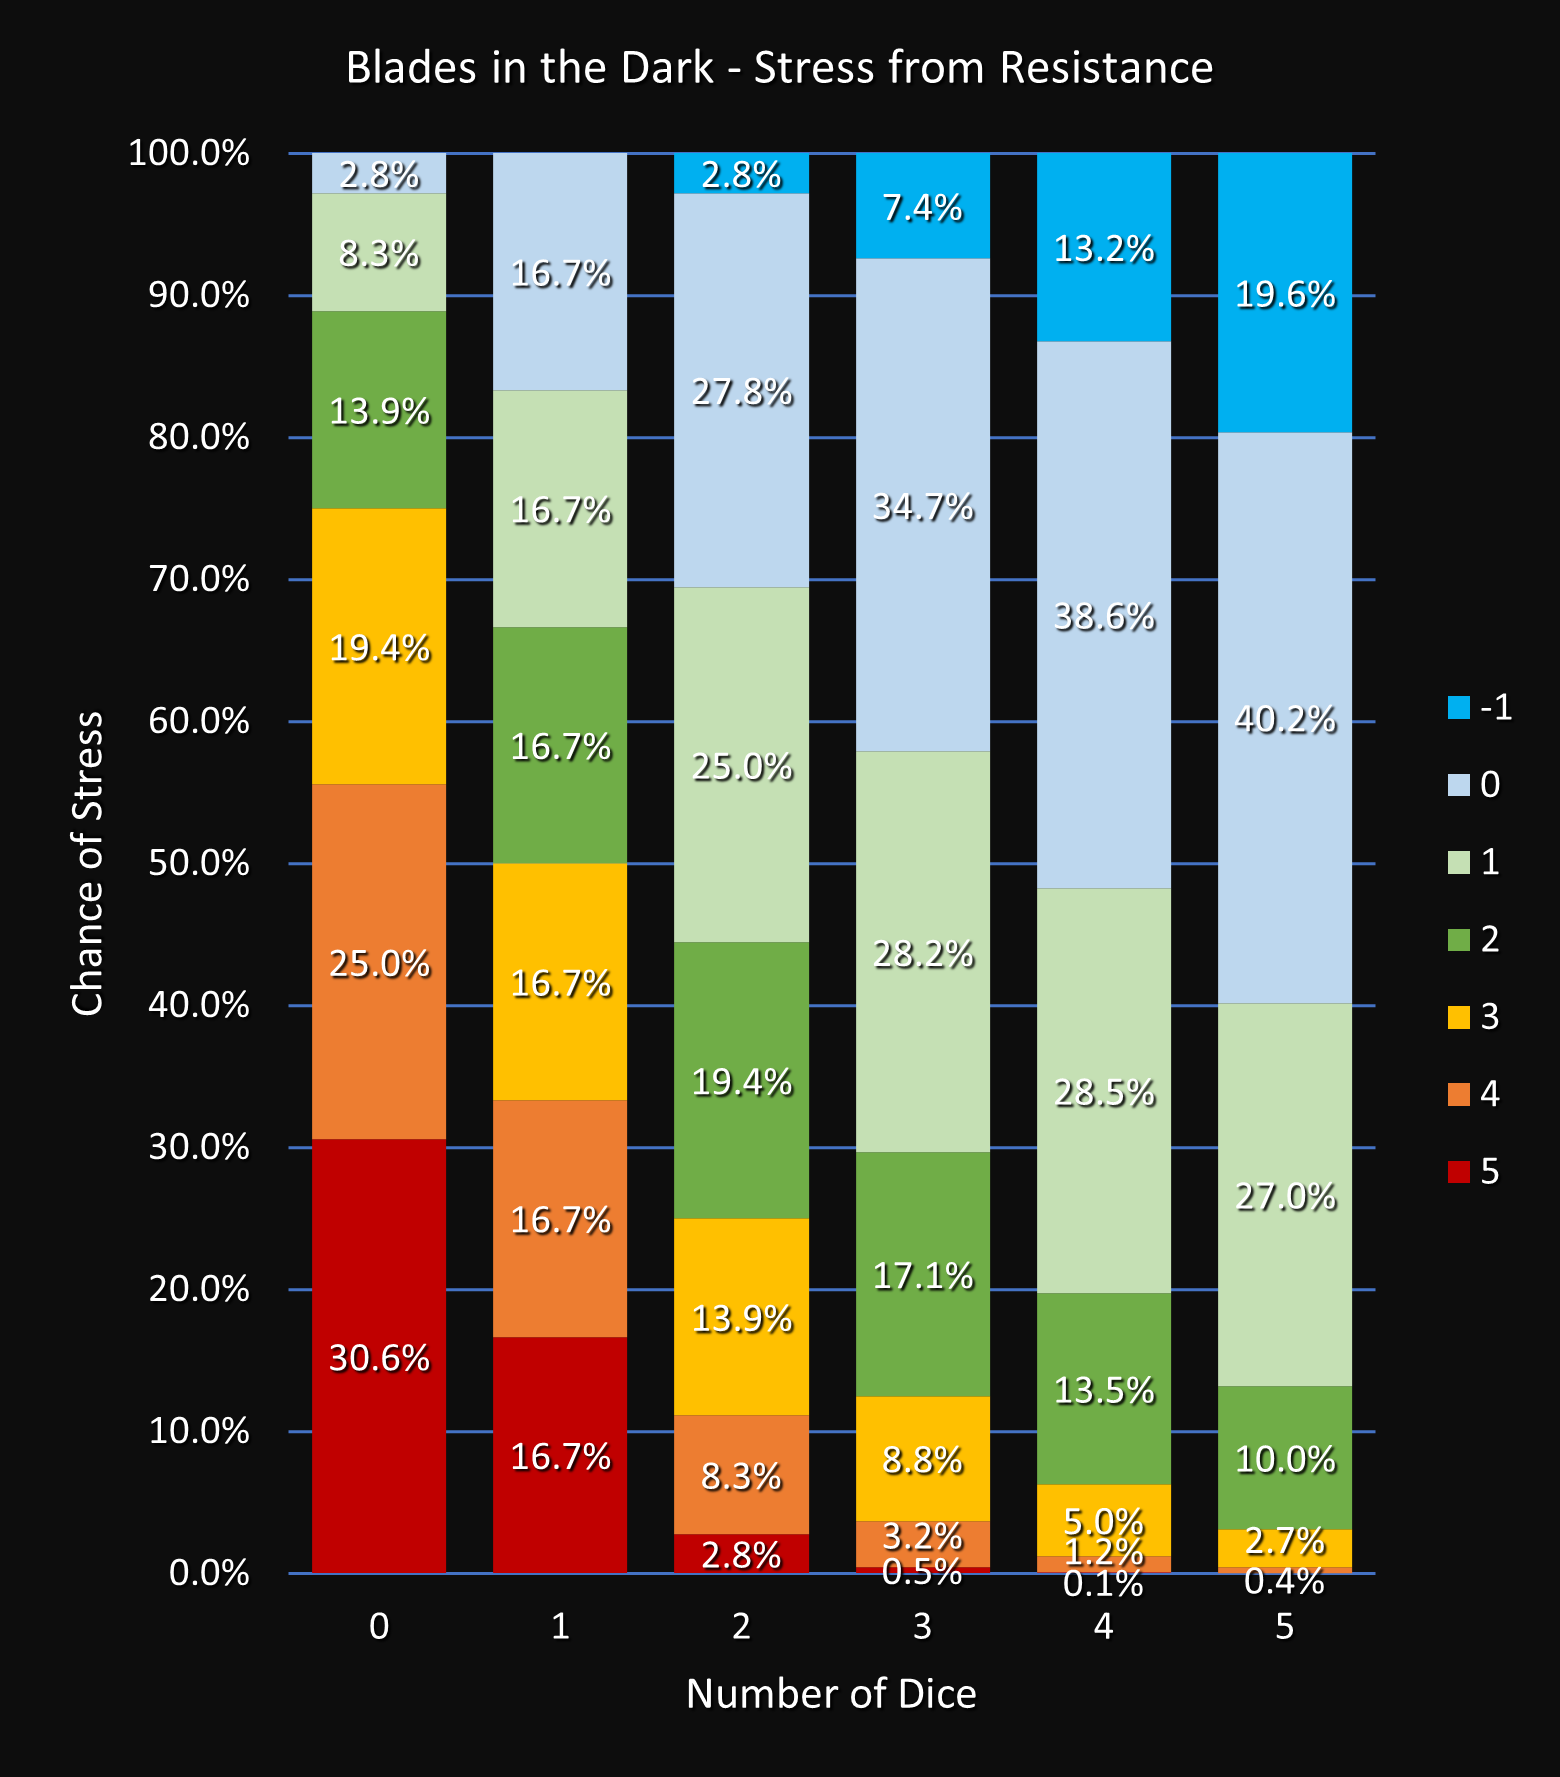
Beyond one dice, the distribution skews increasingly towards having a large chance of low stress cost while having a small chance of a high stress cost. We can greatly improve the readability by calculating the average stress cost but this will not fully portray the shape of the distribution. Players may be more focused on unlucky outcomes not average ones so along with the average we can also calculate an average for the bottom (unluckiest) 10% of outcomes. The 0%-10% chance of stress range shown above corresponds to the bottom 10% figures shown below.
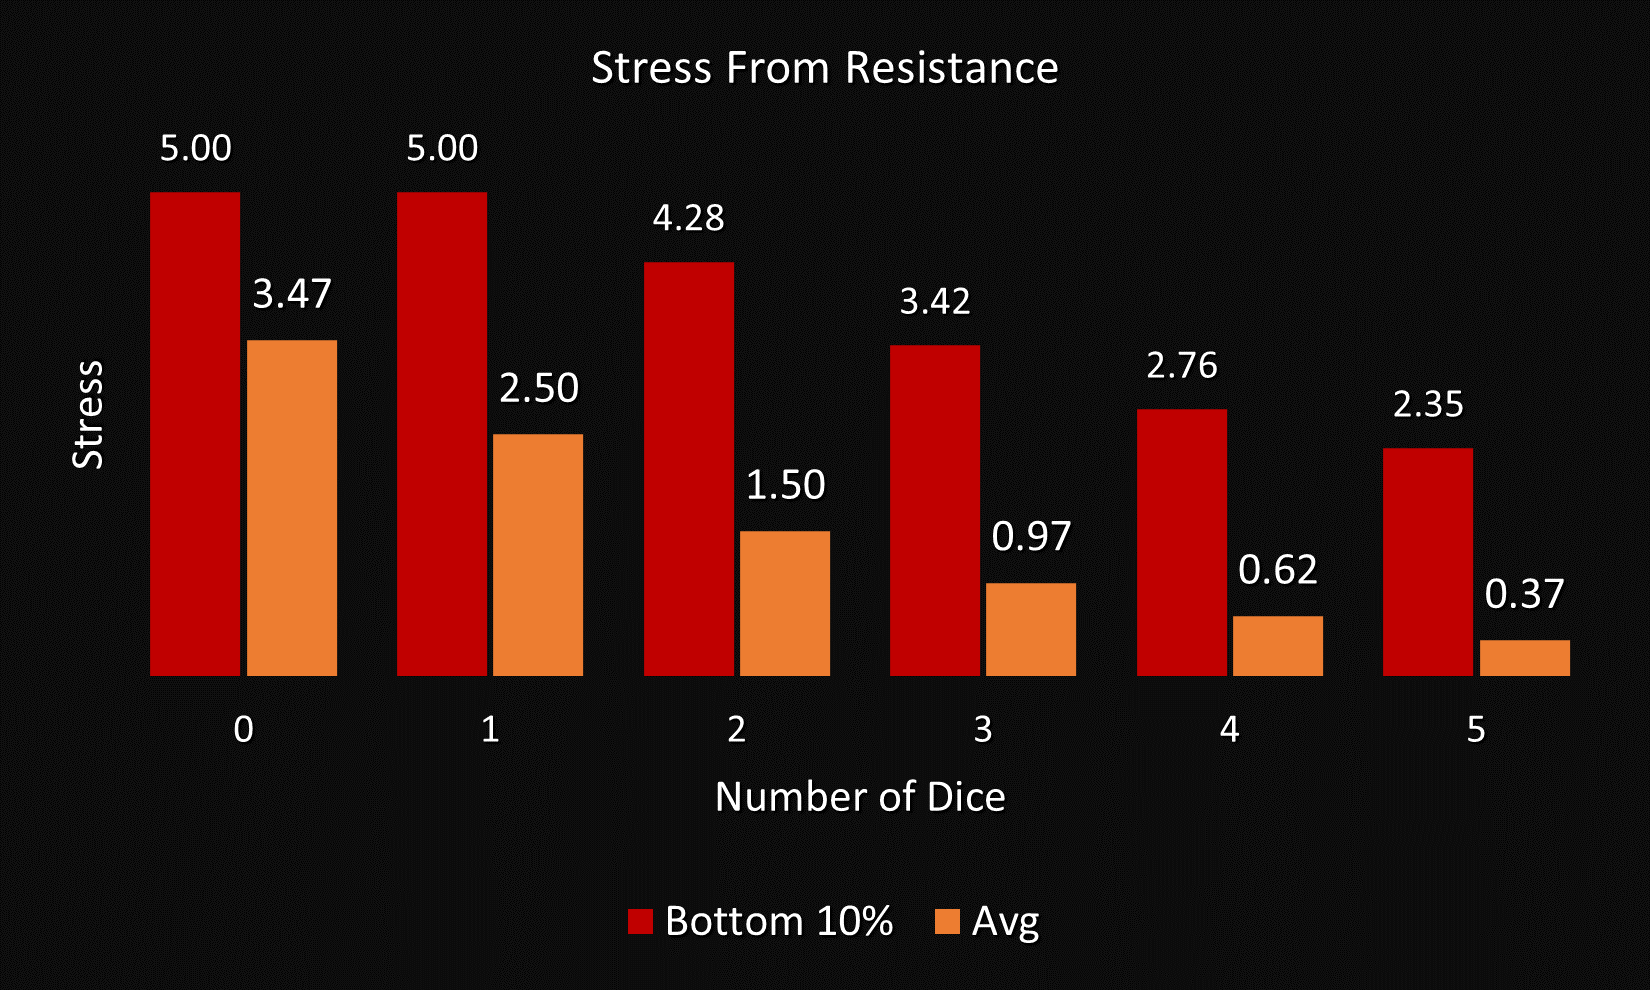
The bottom 10% figure is the same for zero and one dice but that does not mean that those are equal. One dice is still significantly better. In fact, moving from zero to one or from one to two dice both reduce the stress cost by about one whole stress point on average! Even looking at the bottom 10%, pushing yourself will likely result in more stress than it would have otherwise. However, getting an assist may be worth it as it could effectively move (on average) one stress to a different player, but we start seeing diminishing returns beyond two dice.
downtime
Heat and Progress Clocks
There’s a bunch of different rolls that can be taken as downtime activities. It turns out that both heat reduction and project clocks use the same mechanics. Project clocks could be for long term projects, healing, etc.
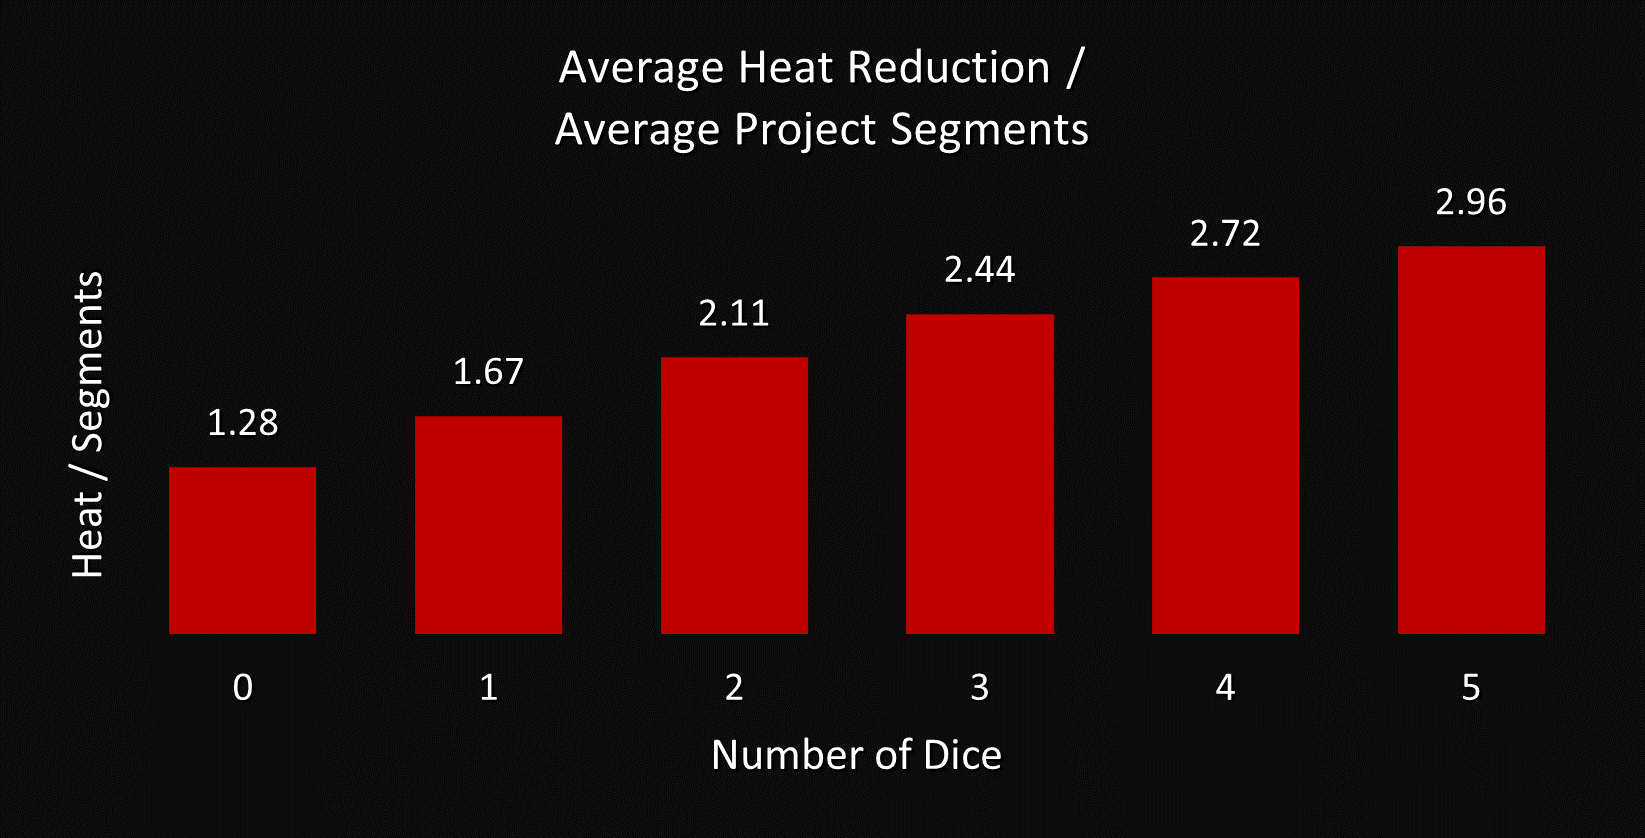
During downtime players can spend one coin to increase the level of a result. However, players can also spend one coin to get an additional downtime activity. Assuming that another attempt is possible it appears to almost always be better to roll again rather than spending coin to increase the result. For example on a heat reduction roll, rolling again is guaranteed to at least reduce one heat but has the potential to do more, whereas increasing the result would only reduce one more heat except when going from a six to a critical. However, criticals can usuall only happen when there are at least two dice and the average heat reduction with two dice is slightly higher than two. Thus the only case where increasing the result is worth it on average would be to get an otherwise impossible critical with zero or one dice after rolling a six naturally.
Since two dice will reduce about two heat on average and it’s very common to have at least two dice, then one coin (spent on a downtime activity) is worth an average of at least two heat.
Stress Reduction
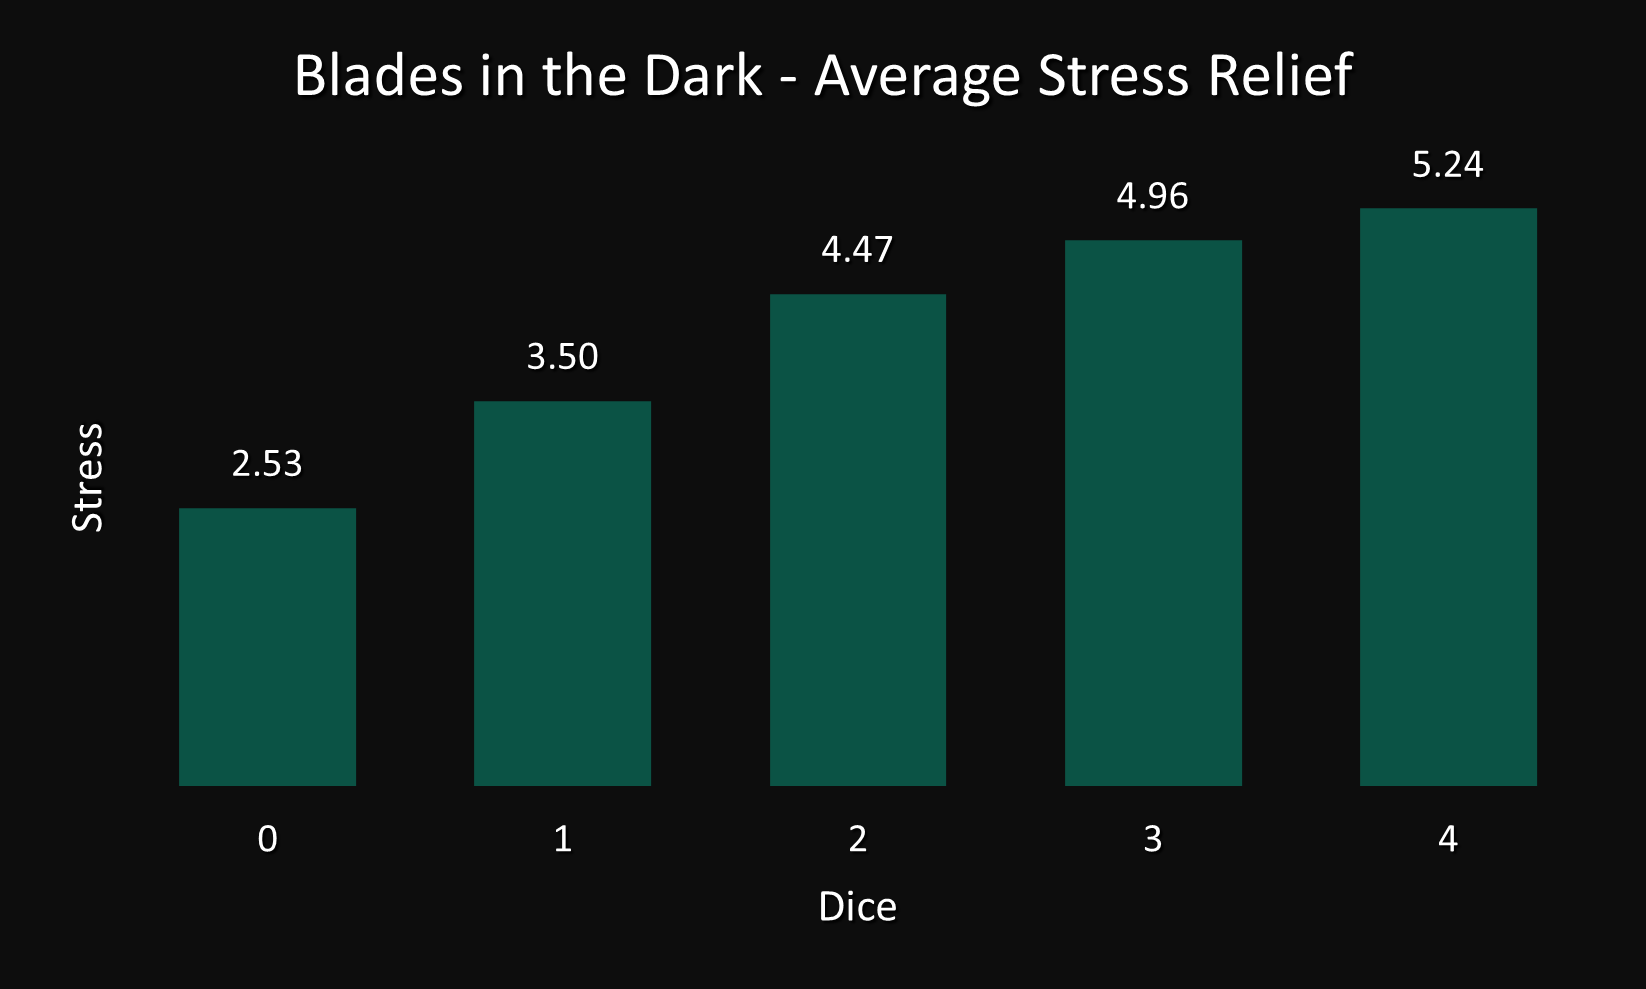
Each dice gives about one more stress point back until after two dice when diminishing returns start kicking in. It’s unlikely that the rules intend for pushing yourself to be allowed on stress relief rolls but it’s also not worth it anyway.
This chart can also be reused for any claim that produces coin using a tier roll. Just substitute coin for stress on the vertical axis and subtract your crews current heat. This means that tier I and II will result in about one more coin on average per downtime compared with the previous tier.
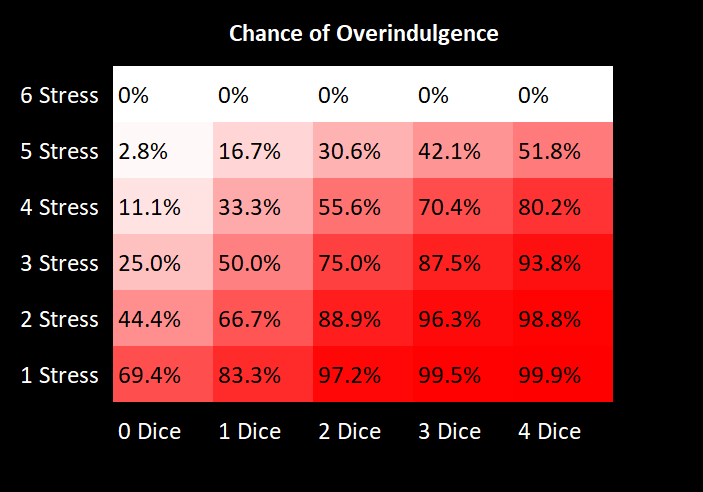
Zero dice makes over indulgence harder but that advantage is almost completely eaten up by the less efficient reduction in stress and ends up being (subjectively) not worth it.
The efficiency of spending a coin to increase the result depends on the situation. Increasing a five to a six is inefficient. Increasing a one to a four or five is much more valuable.
If the player can opt to take the heat for overindulgence (rather than other consequences for overindulgence), and since we established above that two heat are worth about one coin then overindulgence costs about one coin as well.
Got an idea?
Please report errors and suggest ideas for more visualizations with the issue tracker!